
– CANVAS ART PROJECT – TUTORIAL –
The OBGYN’s office that showcases and promotes my photography work ordered a large canvas. None of us really thought how close up the image was for such a large canvas. When it came in everyone who took a look at it could not imagine it on the wall. After offering the canvas to the family in the picture, they gave me a call. Being a picture of three generations and not one of mom, dad & kids they couldn’t imagine where they would hang such a large canvas either!. So, what do you do with a huge, and I mean HUGE, canvas print no one wants? Why paint it of course!
.jpg)
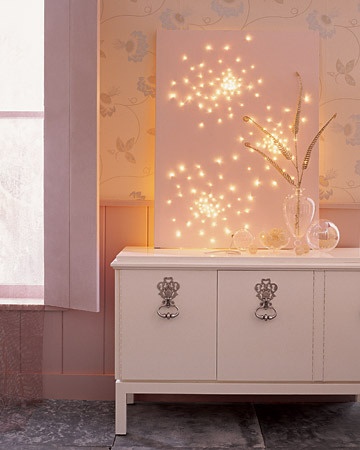
Quite a while back I saw some canvases with lights like this one on Pinterest.
 This got me thinking of how sweet it would be to make a canvas that would be decoration during the day and a night light for my 6 year old daughter at night. We’re just starting to come up with an actual design for her room vs. the hodge podge of everything and anything in there. So far she has a white daybed, the purple desk {see it HERE} and a pretty blue couch. Our new house has nice big bedrooms in lieu of a bonus room leaving plenty of room for all the kids activities, art supplies and toys in their rooms. Love!!
To match her bedroom I choose a vibrant blue shade which is a more saturated and brighter version of the couch. They had a perfect color in the sample section of the Lowe’s Home Improvement paint department. The little sample plastic containers were $3 each and contained 4oz of paint. The paint works great on craft projects to and they had so many pretty colors ready to go, so quite a few went home with us! It only took 5-7 oz of paint to do two good coats on the canvas. As you can see in the image below, the more then life size people in the canvas was just a little Too big. 🙂 Lucky Maddie.

It took me about 3 weeks to get to the next step. I think my poor husband thought I would never get around to it! One day some computer issues slowed down the photography work so my intern and I switched gears to get our paint on. It was such a nice change of pace. I’m loving this website for an excuse to do lots of things I normally put off due to the ever present work us self employed people feel compelled to do. 🙂
The supplies consisted of a set of plastic stencils, paper towels, water, brushes, paint trays {glass wear works great too!} and a variety of paint colors. Since there was no pale pink, it was fairly easy to put some red in the tray mixed with white until the color looked good. I hadn’t put much thought into how the hearts would go on. After the first one it all solidified in my mind that it would look cool to have a cluster of hearts at the top corner going out to only one in the opposite corner. The thought came from imagining confetti being thrown out from the top corner. The colors were inspired by Maddie’s quilt. To wrap the shape around the corner of the canvas we would hold the stencil on then roll it to the other part once the first part was filled. TIP: Make sure to wipe off the paint on the stencil after each application.
The smallest heart stencils were the hardest. If it didn’t work out well we used the next size up to fix the wonky heart.
When we finished painting on the hearts, Alyssa and I discussed putting Maddie’s name or nicknames on the canvas. My original thought was to put all of her many nicknames around the canvas or across the bottom. It just didn’t look like it would fit well. When Guy got home from work he said he really wanted to put her name on it and just went for it!
The next night I tackled the lights. Again it was with a vague idea of how it would work. The lights were LED twinkle lights purchased off Amazon when the original inspiration struck just waiting for the time I’d actually go for it! {Check them out HERE} The lights are three wires with what looks like a blob of glue every once in a while. After testing them to see if they got hot it seemed fine to proceed. I had a big pack of electrical tape which I used to tape the lights to the right places. TIP: To get the canvas to sit flush on the wall you can create a groove in the frame the cord sits in.
Once the lights were in a pretty random looking path it was time to poke the holes. I raided the garage for a variety of tools that might work. The thing that worked the best was a dart with a metal tip. The holes were pretty small. I turned each light to sit pointing into the hole securing it with some tape.
Because the paint was so thick on the canvas, the lights can only be seen if there is a hole. Had the canvas been a raw canvas with no paint the light may have shown through. TIP: To make the small tape pieces easier to grab, I tore it off in long strips hung from the canvas edge cutting off pieces as needed. The color of the tape did not make a difference in the color of the light showing through.
I love love how the canvas came out.
Once her room isn’t such a crazy mess of odds and ends kids stuff, and the walls are painted something interesting I think it will all tie together nicely!
The lights need to be plugged in and unplugged to turn them on and off. My awesome friend recommended getting a timer as a way to cut down on accidentally leaving them on or for kids too young to use plugs.
Maddie has been talking about her new art and nightlight every time she sees it and whenever she thinks about it. The sweet spontaneous hugs with words of appreciation have made the project more meaningful then I ever could have imagined. We would love to see your project. Share yours in the comments.


Wendy - Finally! A picture of this awesome canvas art. I love it! Great work. I may try it with one of my canvases too. 🙂May 31, 2014 – 3:35 am